![]()

What is geotagging of photos?
Geotagging of photos is inserting geographical metadata in the EXIF-information of a digital pictures. (EXIF-information is hidden data in the digital pictures, which for instance can tell you the make of camera, aperture, shutterspeed and most important the time of the exposure.)
Geotagging can be done manually, but it is far easier to use a GPS-receiver to automatically log positioning data and then use your computer later on to insert this data in the EXIF-information of the photos. This ensures that you can find the place where you took the photos - also after 10 years has passed.
There are two ways to tag photos using a GPS-receiver:
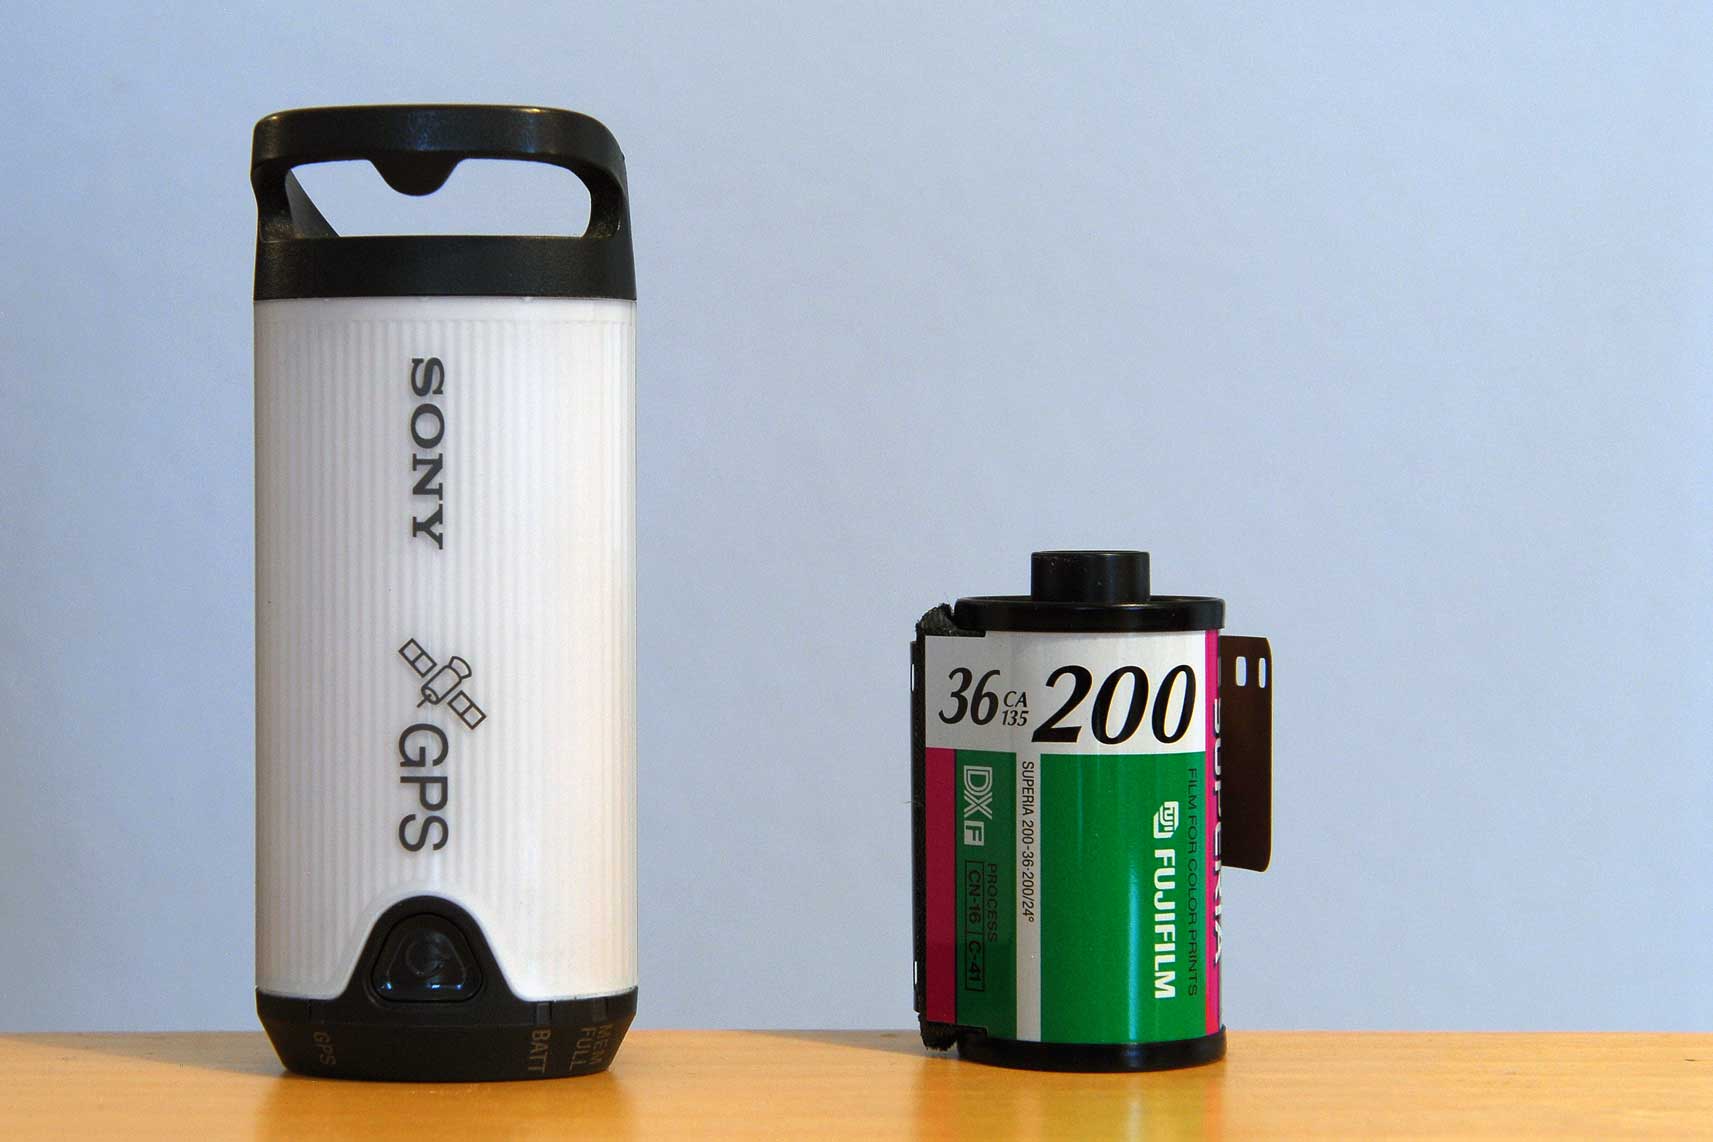
I'm using method 2 and have a Sony GPS-CS1, which is a cheap little GPS-logger. (At the time of writing - January 2009, it can be bought for 295 kr in Kamerahuset on Frederikssundsvej in Křbenhavn/Copenhagen.)
There are probably better GPS-units out there. All units, which can save a tracklog can be utilized. Some units made for car navigation has this functionality, so read the manual of yours.
Here's a link to a review of several units: http://scilib.typepad.com/science_library_pad/2006/09/my_review_of_th.html
The Sony GPS-CS1 is made in three different versions. Sony GPS-CS1, Sony GPS-CS1KA and Sony GPS-CS1KASP. The only diffence is the software which comes with the unit - and as the software is pretty useless, the version of the Sony GPS-CS1 doesn't matter.
Specifications (according to Sony)
When I'm on vacation, I usually turn the unit on in the morning and leave it on all day. I turn it off upon returning to the hotel at night.
When charging the batteries for the camera, I charge the used AA-cell from the GPS-unit and put a fresh one in the unit.
There's a holster and a carabiner in the box, but the carabiner isn't very solid, so I've fixed the holster to the camera strap.
The Sony works like a 31 MB USB-stick on Windows 2000/XP/Vista. It'll pop up as a drive, from where you can copy the .txt-files with positioning data to your harddrive.
It'll name the files based upon the time it was turned on. It uses ISO 8601-format, without punctuations and spaces.
For instance: WG20081225091639.log = 2008-12-25 09.16.39 = Thursday December 25. 2008 - 09.16.39.
When these data are used, you need a computer program to merge the positioning data and the EXIF information. The camera clock is used for this syncronization so it's very important that it is set correctly!
I use Nikon Control to ensure that my camera clock is set correctly before setting out on a trip.
I use the computer program RoboGEO to merge data. http://www.robogeo.com/home/
It's quite user-friendly, yet has many options, which I'll try to describe.
RoboGEO works with most (all?) RAW-formats from different camera makers.
This is an example of how the program actually works.
First you need to define the Time Zone.
GPS data is logged in GMT, and as I prefer to have the camera set to local time, RoboGEO needs to know the time difference.
This is done in "File->Preferences->CommonSettings->UTC Time Bias".
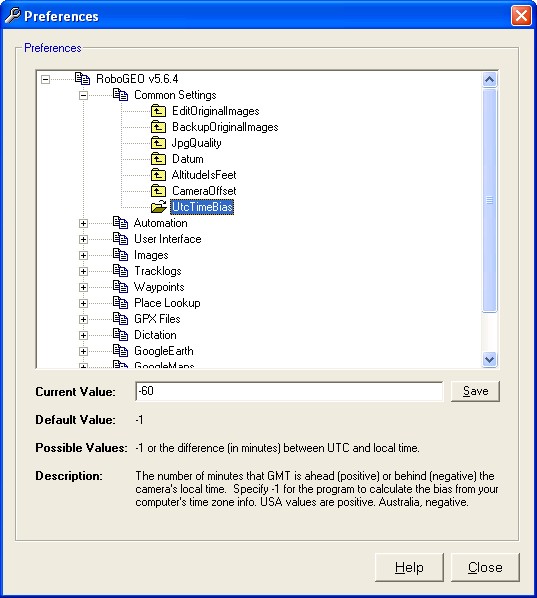
Unfortunately it's less than inituitive that time differences needs to be set in "negative", so my photos from Germany, which is at GMT+1 must be adjusted by -60 minutes.
This function can naturally also be used, if the camera clock was set wrongly.
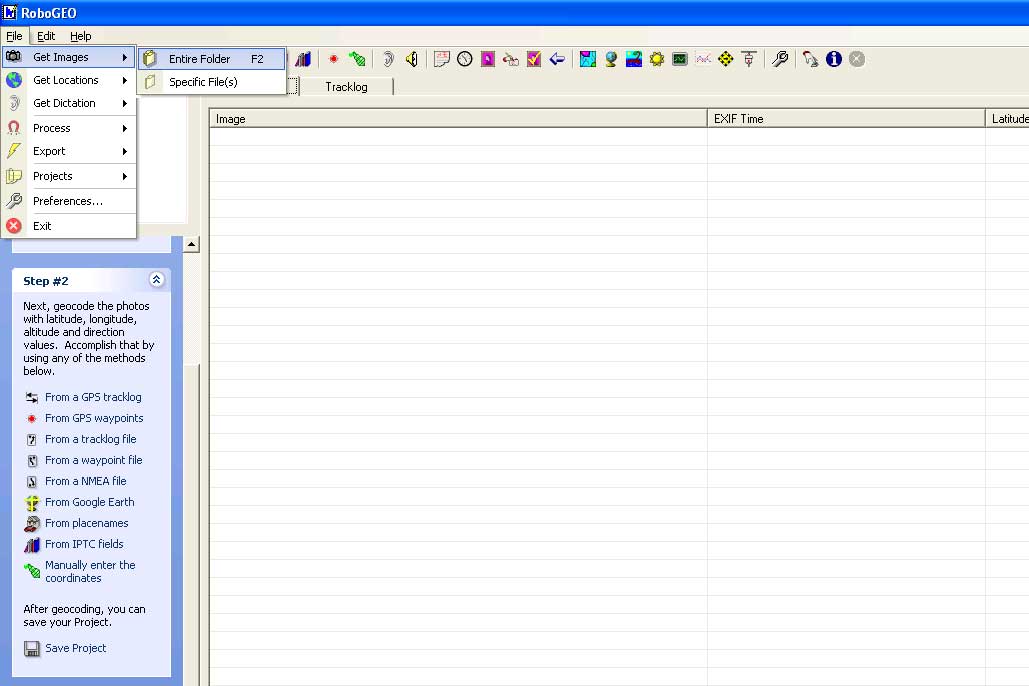
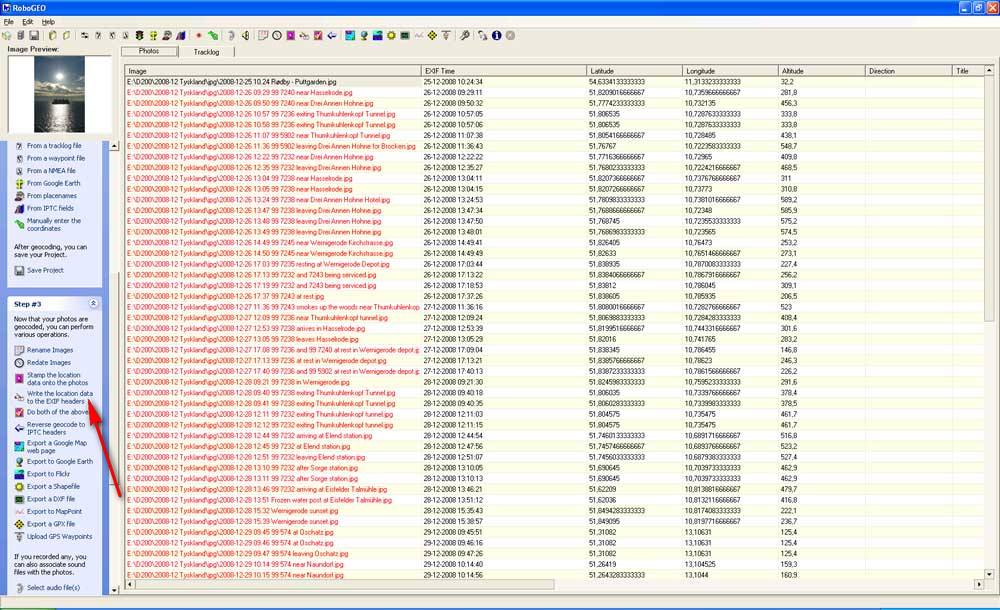
The photos are added to RoboGEO
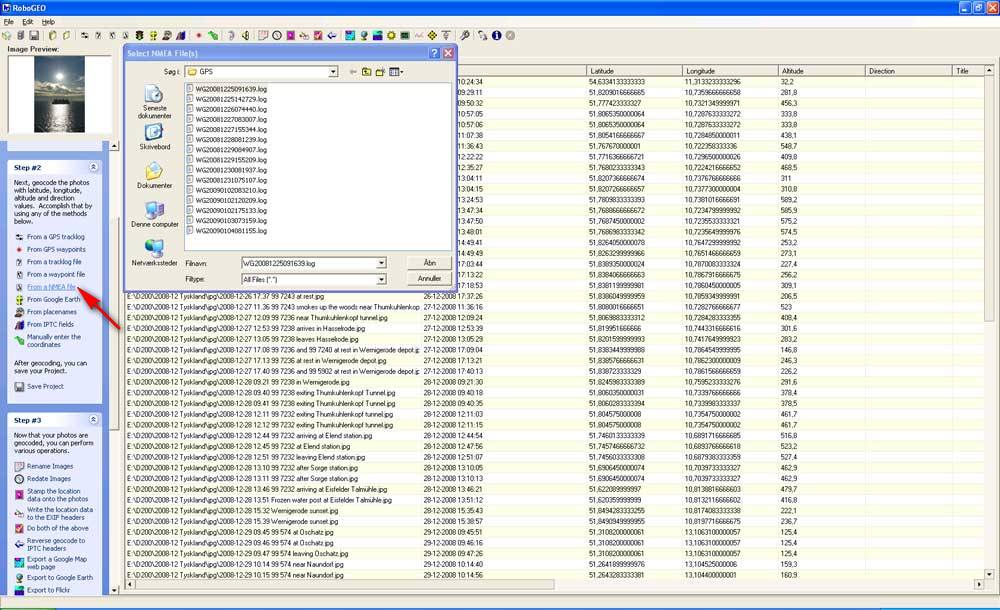
The trackfiles are added. "From a NMEA-file." is selected. All the files in the dialog box are selected and added.
Location data is written to the EXIF-header (hidden in the file).
Then you're done and you're free to explore the other options in the program. "Create Googlemap" is selected
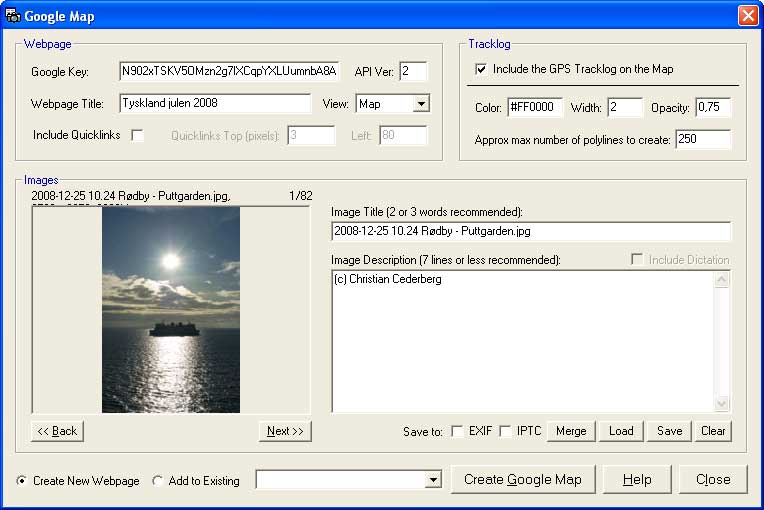
You need a Google Map Key, which can be obtained at http://code.google.com/intl/da/apis/base/signup.html
The program does it's thing and the result is as shown:
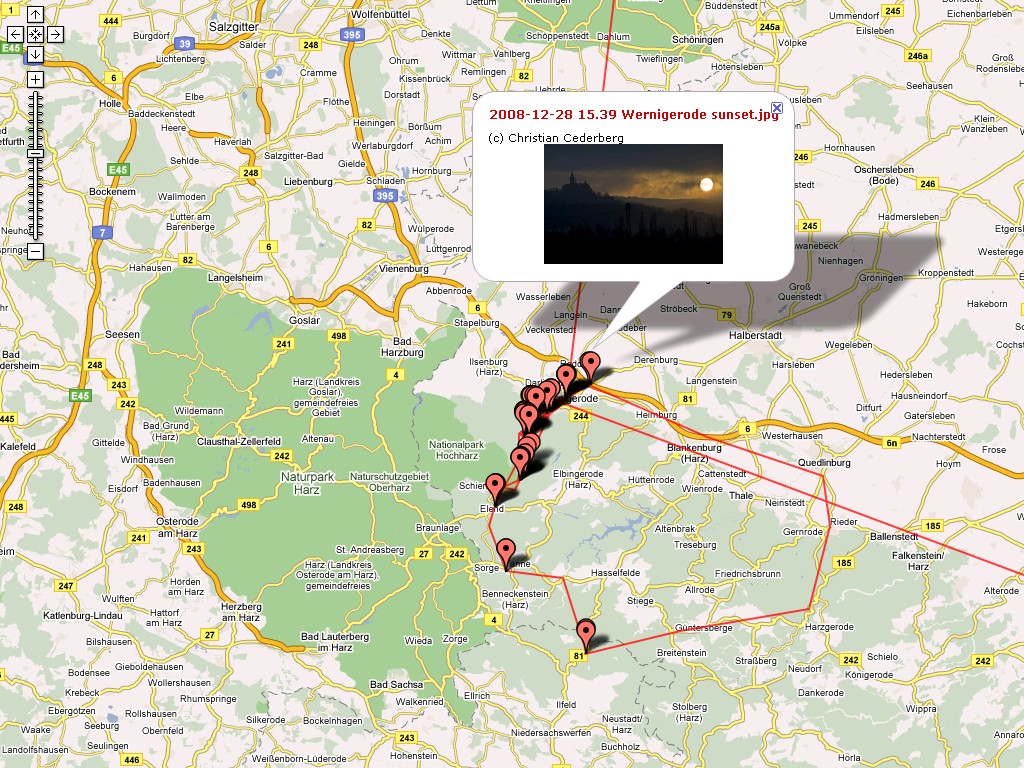
As you see the red tracklog doesn't follow the roadnet completely. This is because the GPS-receiver was in the trunk of the car, when we drove from one photo position to the next.
Obviously it lost track during this and therefore it connects the "missing" points automatically.
The full result is shown here: http://www.damplokomotiv.dk/TysklandNytaar2009/googlemaps/map.htm
Furthermore I'd like to mention that there's some Freeware alternatives to RoboGEO. They didn't exist, when I purchased RoboGEO, so I've never tried any of them.
The alternatives are Geosetter:
and Microsoft Pro Photo Tools:
Try them out before paying for RoboGEO.
Article written January 2009.